Getting Started
e-Certify / Help Center / Getting Started
Transitioning from the green card to e-Certify
No more handwritten forms
Preparing certified mail the traditional way requires filling out PS Form 3800 by hand and attaching it to the front of your envelope. Then, you would need to peel off the tracking number and attach it to the corresponding green card which would get attached to the back of the envelope. This process is time-consuming, tedious, and error-prone. e-Certify replaces PS Form 3800 with a clean, printed banner page that is displayed in a window envelope or a simple thermal label that is affixed to the front.
Your new, streamlined proof of delivery
Just like PS Form 3800, manually filling out the green card, also referred to as PS Form 3811, is cumbersome and tedious. After delivery, the sender must wait for the green card to be returned, and the risk of it getting lost in the mail stream is a threat to security and could have legal consequences. The electronic return receipt solves all these issues and carries the same legal status as the green card. With e-Certify, you’ll receive an email notification with the electronic return receipt attached as a PDF upon delivery of the mail piece. Your electronic return receipts are stored securely in e-Certify, available for you to view and download at any time, from anywhere.
How to get set up
Step 1: Sign in to e-Certify
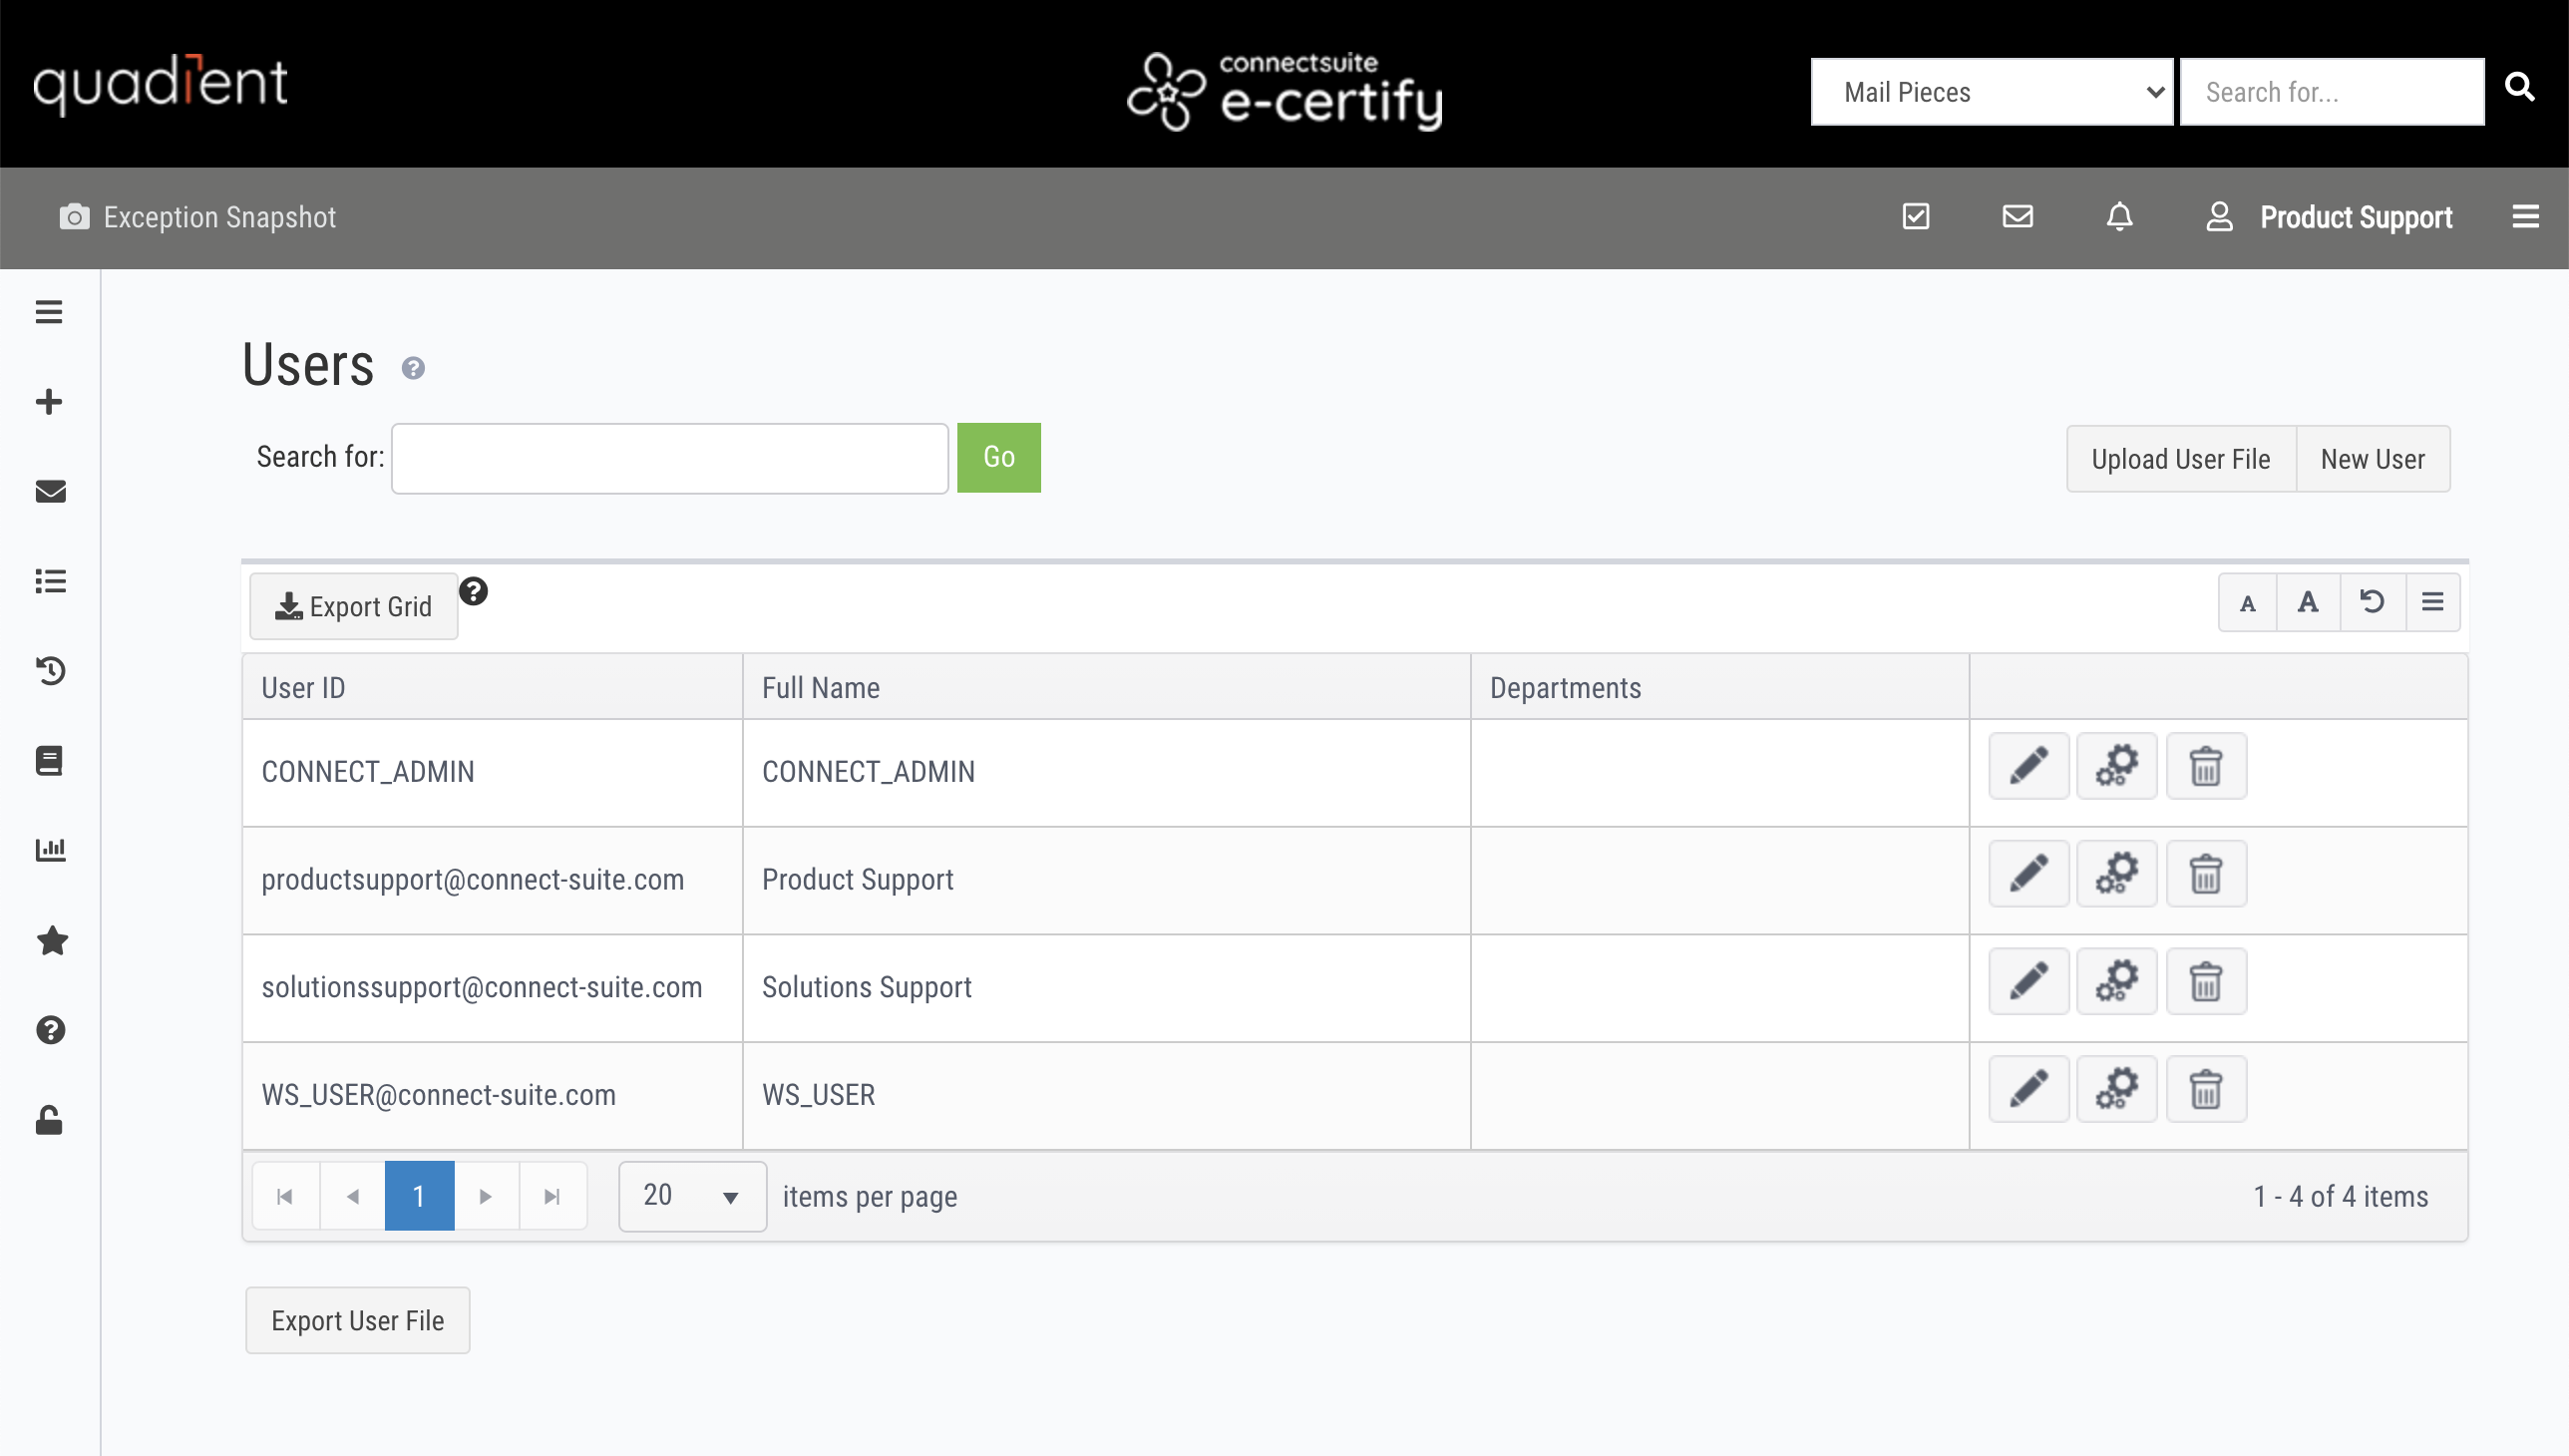
Step 2: Create additional users (optional)
You can create additional users to allow others to use e-Certify and create mail pieces.
- Use the right navigation bar to navigate to the Users page.
- To create a new user, click New User.
Learn more about Users or watch the video tutorial.
Step 3: Create your own tracking label (optional)
The Tracking Labels page allows you to customize the layout of your banner pages and thermal labels with a high level of flexibility and functionality. We provide six default tracking labels based on the most popular types of envelopes and labels. However, if you would like to customize your own, you can do so.
- Use the right navigation bar to navigate to the Tracking Labels page.
- To create a new tracking label, click New Tracking Label.
Learn more about Tracking Labels or watch the video tutorial.
Step 4: Create a mailing profile
At the heart of e-Certify, the mailing profile integrates your organization’s mailing needs with the USPS. When creating a mail piece, you will need to select a mailing profile to use. This auto-populates a number of fields and speeds up your workflow.
- Use the right navigation bar to navigate to the Mailing Profiles page.
- To create a new mailing profile, click New Mailing Profile.
Learn more about Mailing Profiles or watch the video tutorial.
How to create a mail piece
Step 1: Create a mail piece
After the simple setup is complete, you are ready to create a mail piece.
- Navigate to Create Tracking: To create a mail piece, open the left navigation bar and select Create Tracking.
- Select A Profile: Select a mailing profile to use for the mail piece. This will auto-populate a number of fields on this page and speed up your workflow.
- Add Recipient Address: Enter an address into the Name/Address Block. You can click Validate Address to ensure USPS compliant formatting based on USPS standards. If you manually entered an address, you can select Add to My Address Book to save the address to your address book.
- Calculate Postage: Estimate the postage required for your piece. Note that this is only an estimate and doesn’t need to be exact.
- The Envelope Type field will be auto-populated according to your mailing profile selection, but can be edited.
- Select a method for calculating postage, and then enter the appropriate page count, weight, or postage.
- Custom Fields: Here, you have the option to add custom fields. These are variable fields associated with the mail piece that help with mail piece search and identification. Depending on your settings for custom fields in various places, these fields may be auto-populated.
- Additional Settings: All of these fields will be auto-populated according to your mailing profile selection. Depending on the configuration of the selected mailing profile, some fields may or may not be editable.
- The Tracking Label, Departments, and Locations fields will all be auto-populated according to your mailing profile selection and will always be editable.
- Email Notifications: Configure email notifications for the piece. Depending on the configuration of the selected mailing profile, these fields may or may not be editable. Select Proof of Acceptance Email to receive an email with the POA attached when the USPS accepts the mail piece. Select Proof of Delivery Email to receive an email with the POD attached after the mail piece is delivered and signed for.
- Extra Services: Select the extra services you would like with the mail piece. Depending on the configuration of the selected mailing profile, these fields may or may not be editable.
- Save your mail piece: When you’re done, click Save. Or, if you want to create another piece with all of the exact same selections and settings but a new recipient address, click Save and Create Similar.
Learn more about Mail Piece Creation or watch the video tutorial.
Step 2: Print the banner page
After mail pieces are created and saved, they are placed in your Mail Queue.
- Open and print the banner page for your mail piece by clicking the paper icon to the right of it. Or, select the checkbox next to the piece and click Download Banner Pages.
- Fold and insert the banner page into your window envelope.
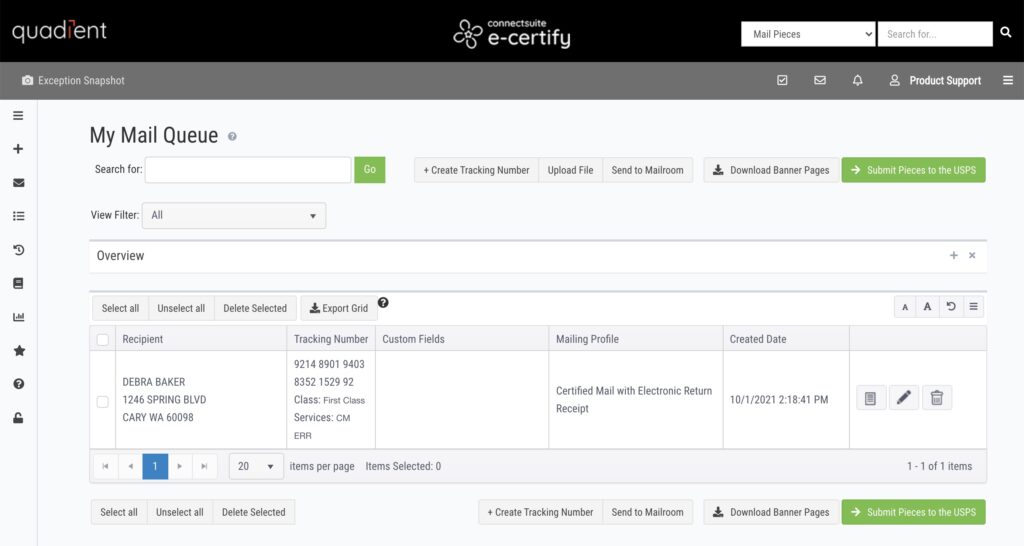
Step 3: Submit your mail piece to the USPS
Before actually entering your mail piece into the mail stream, it is crucial to first submit it to the USPS. To do this, select the checkbox next to the piece, then click Submit Pieces to the USPS. This does three important things:
- It lets the USPS know the mail piece is coming.
- It generates the USPS paperwork for the mail piece, including the Firm Mailing Book for Accountable Mail (PS Form 3877) and SCAN Form (PS Form 5630).
- It allows tracking and electronic return receipt data to be returned and retrievable in e-Certify.
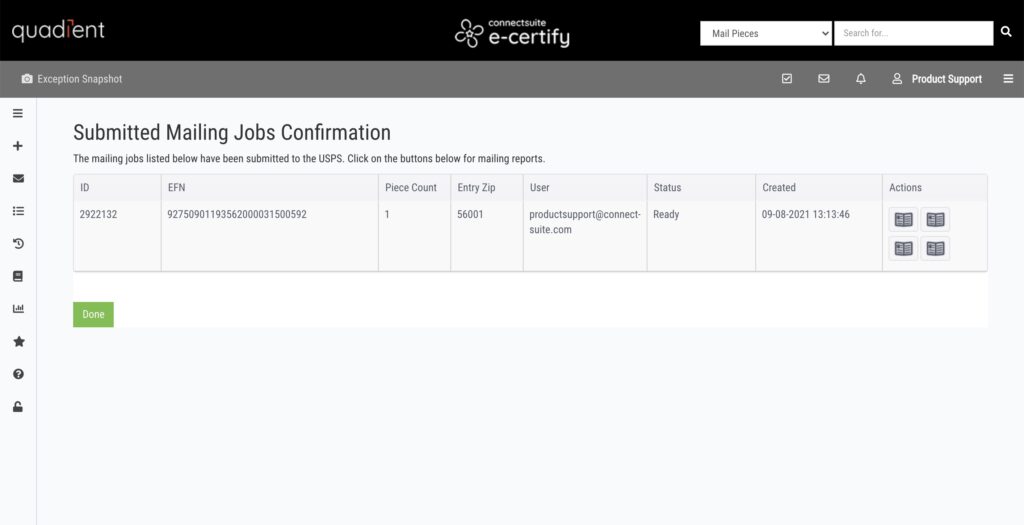
Upon submitting your piece to the USPS, you will be taken to a confirmation page where you can download the completed PS Form 3877 or PS Form 5630.
Your mail piece is now ready to be entered into the mail stream.
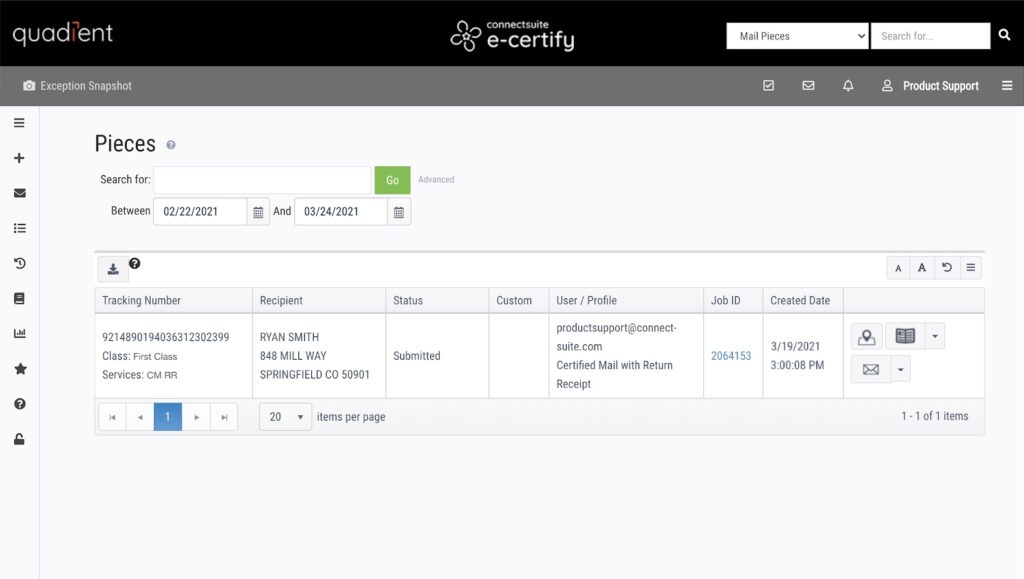
How to track your mail piece
When sending a piece of certified mail, you can track it every step of the way through the mail stream right in e-Certify.
- Use the left navigation bar to navigate to the Piece Search page.
- To view up-to-date tracking information for your mail piece, click the map icon to the right of it.
Learn more about the Piece Search page or watch the video tutorial.
How to view the electronic return receipt
After your mail piece has been delivered and signed for, you will want to access the electronic return receipt, also referred to as the proof of delivery (POD) or signature file. If selected during mail piece creation, you will receive an email notification with the POD attached after your mail piece has been delivered and signed for. In addition, the POD will be made available to view and download in e-Certify.
- Use the left navigation bar to navigate to the Piece Search page.
- To view the POD for your mail piece, click the paper icon to the right of it.
Learn more about the Piece Search page or watch the video tutorial.