Whether you have more than one geographic location, multiple drop ZIP Codes, or employees working remotely, the Locations page helps you manage these complexities. Create locations for your company and assign users to those locations. Then, select a location when assigning access in places such as Mailing Profiles and Mail Piece Creation to ensure the correct users have appropriate access.
Explore Features
View locations
New Location: Create a new location.
Edit an existing location.
Delete an existing location.
Clone an existing location.
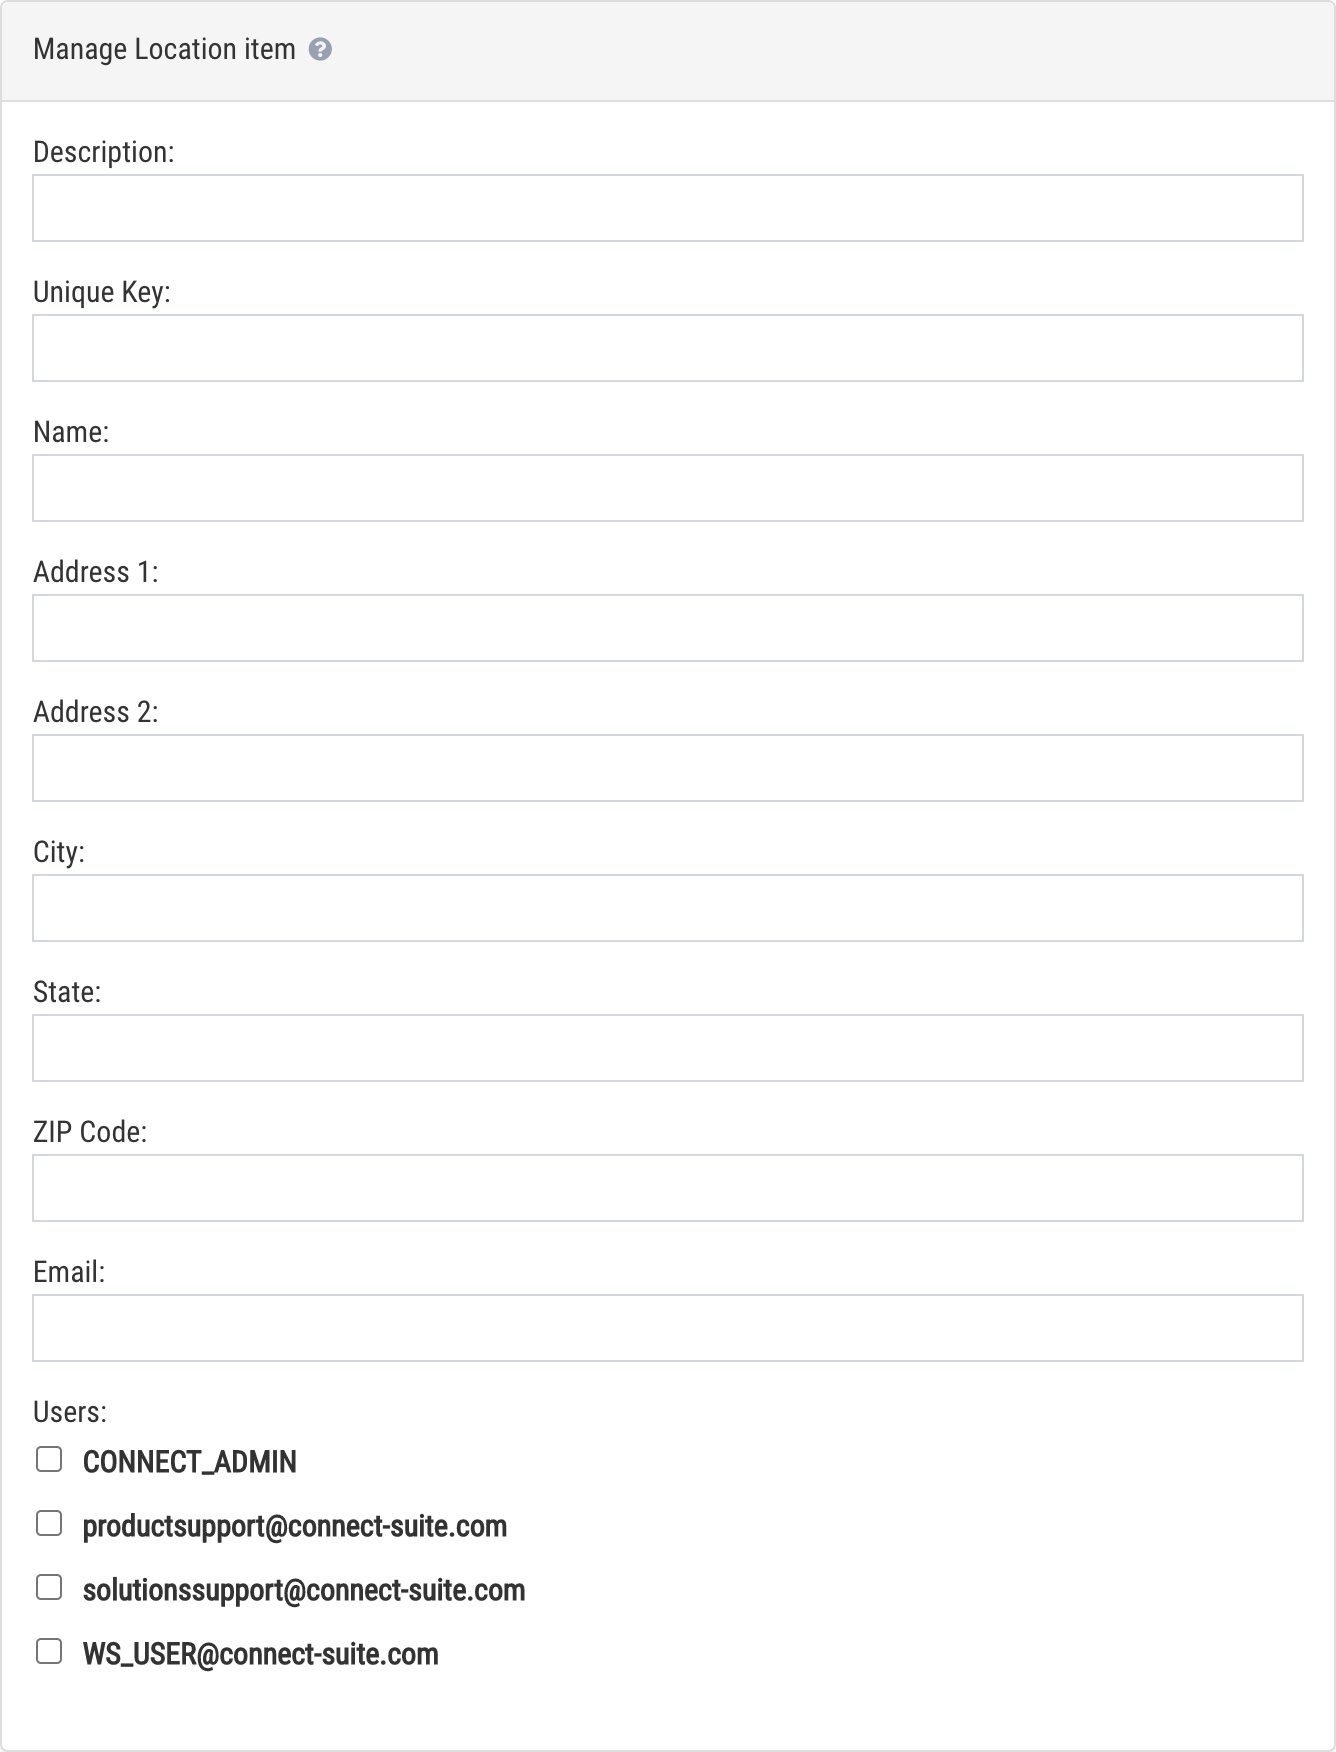
Create a new location
Description: A short description of the location. This is the name that will appear in the drop-down list when assigning access in places such as Mailing Profiles and Mail Piece Creation.
Unique Key: This field is used when uploading users. Upload users via the Users page or the Data Upload page.
Name/Address: Enter an address for the location. See sender/return address information below.
Email: Contact email for the location
Users: Select the users you would like to assign to the location. Note that a user can belong to multiple locations.
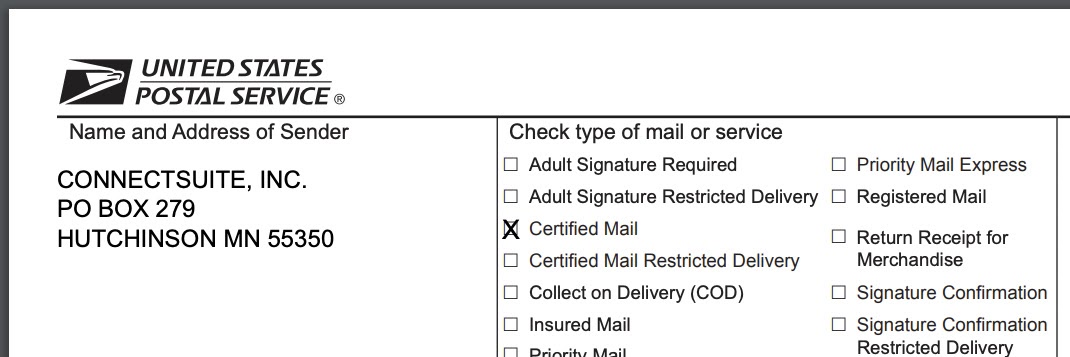
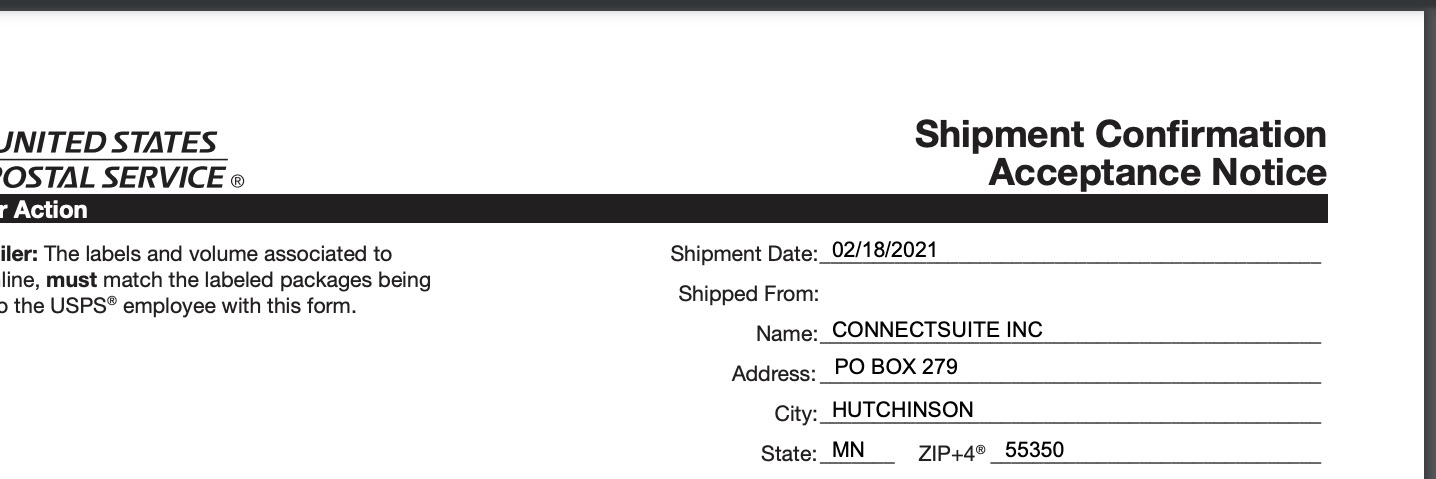
Sender/return address information
Your sender/return address is used in the following places:
The sender/return address on the banner page
The Name and Address of Sender field on PS Form 3877
The Shipped From fields on PS Form 5630
The address used in these places is pulled from the following, in this order: