Address Book
e-Certify / Help Center / Address Book
Overview
The Address Book is designed to increase efficiency of mail piece creation by providing easy access to your most used addresses. Use the Address Book Lookup button during mail piece creation to quickly select an address saved in your address book. An address can either be public, meaning all users in your organization can access it, or private, meaning only you can access it.
Explore Features
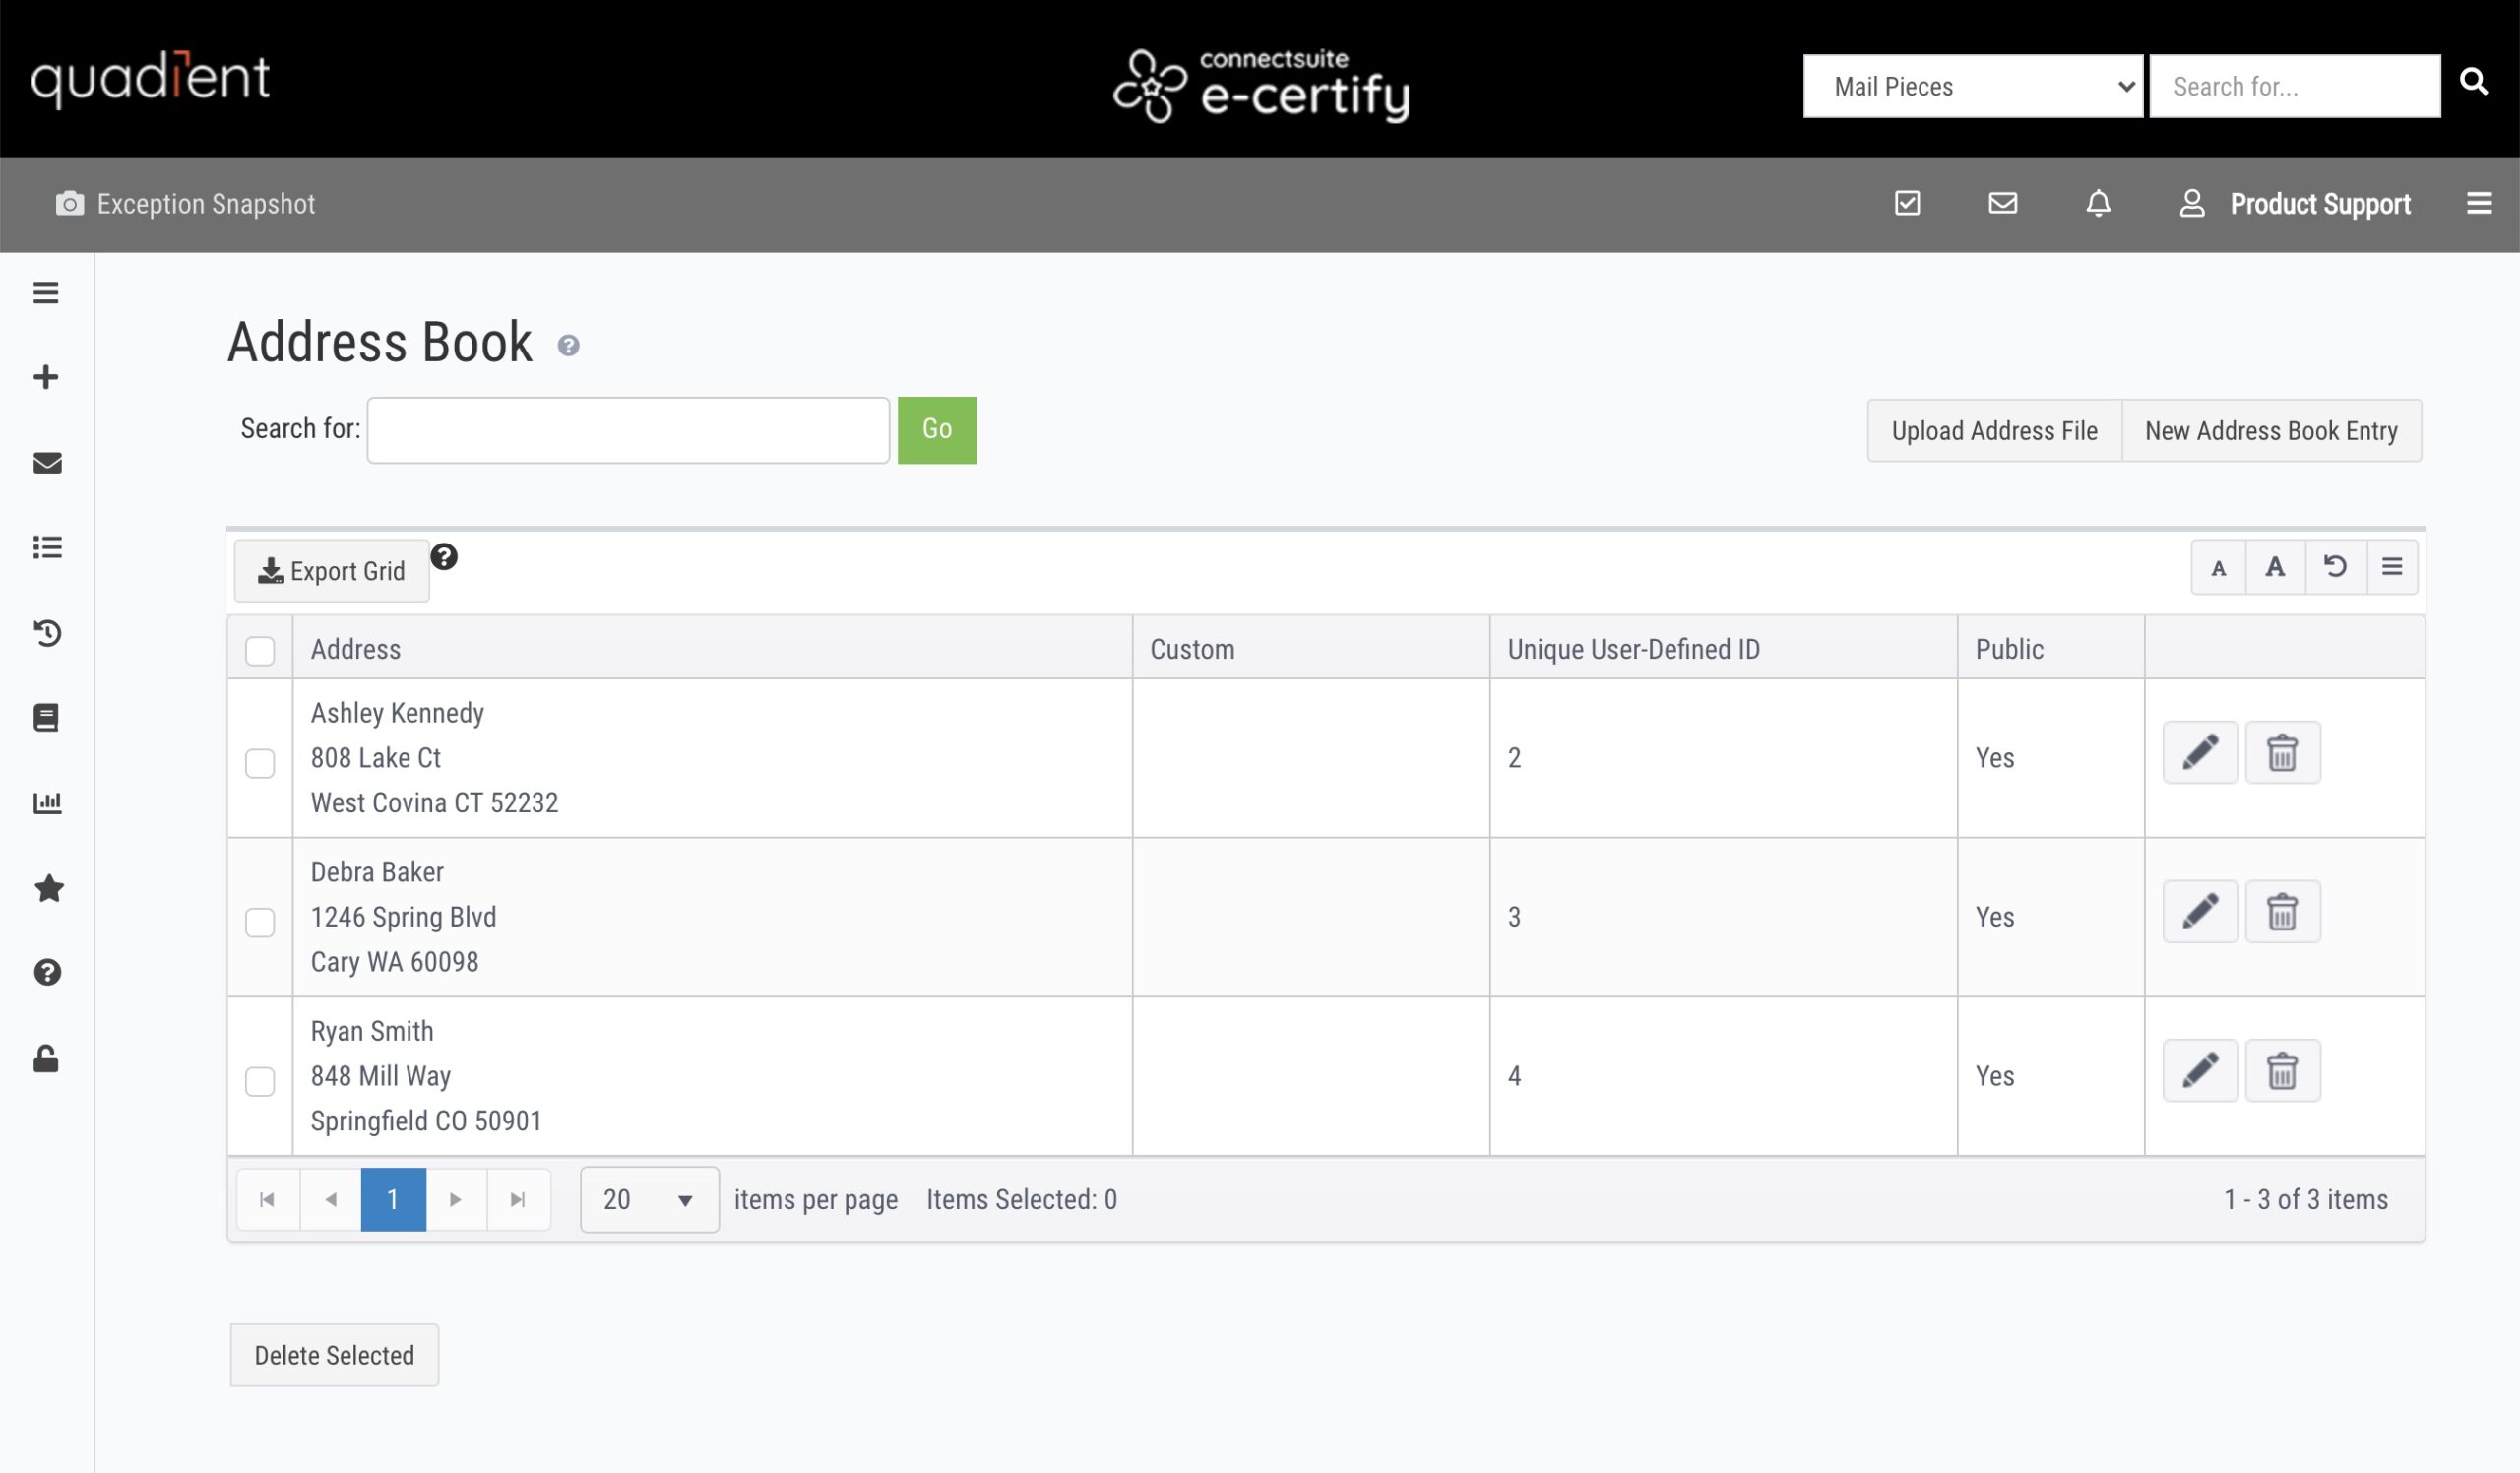
View addresses
Search: You can search for all or part of a name, street, city, state, or ZIP Code in your address book. Wildcards include % and _. For example, search 56___ or 56%1 to get ZIP Codes like 56031 or 56001.
New Address Book Entry: Manually add a new address to your address book.
Upload Address File: Upload a batch of addresses to your address book.

Edit an existing address book entry.
Delete an existing address book entry.
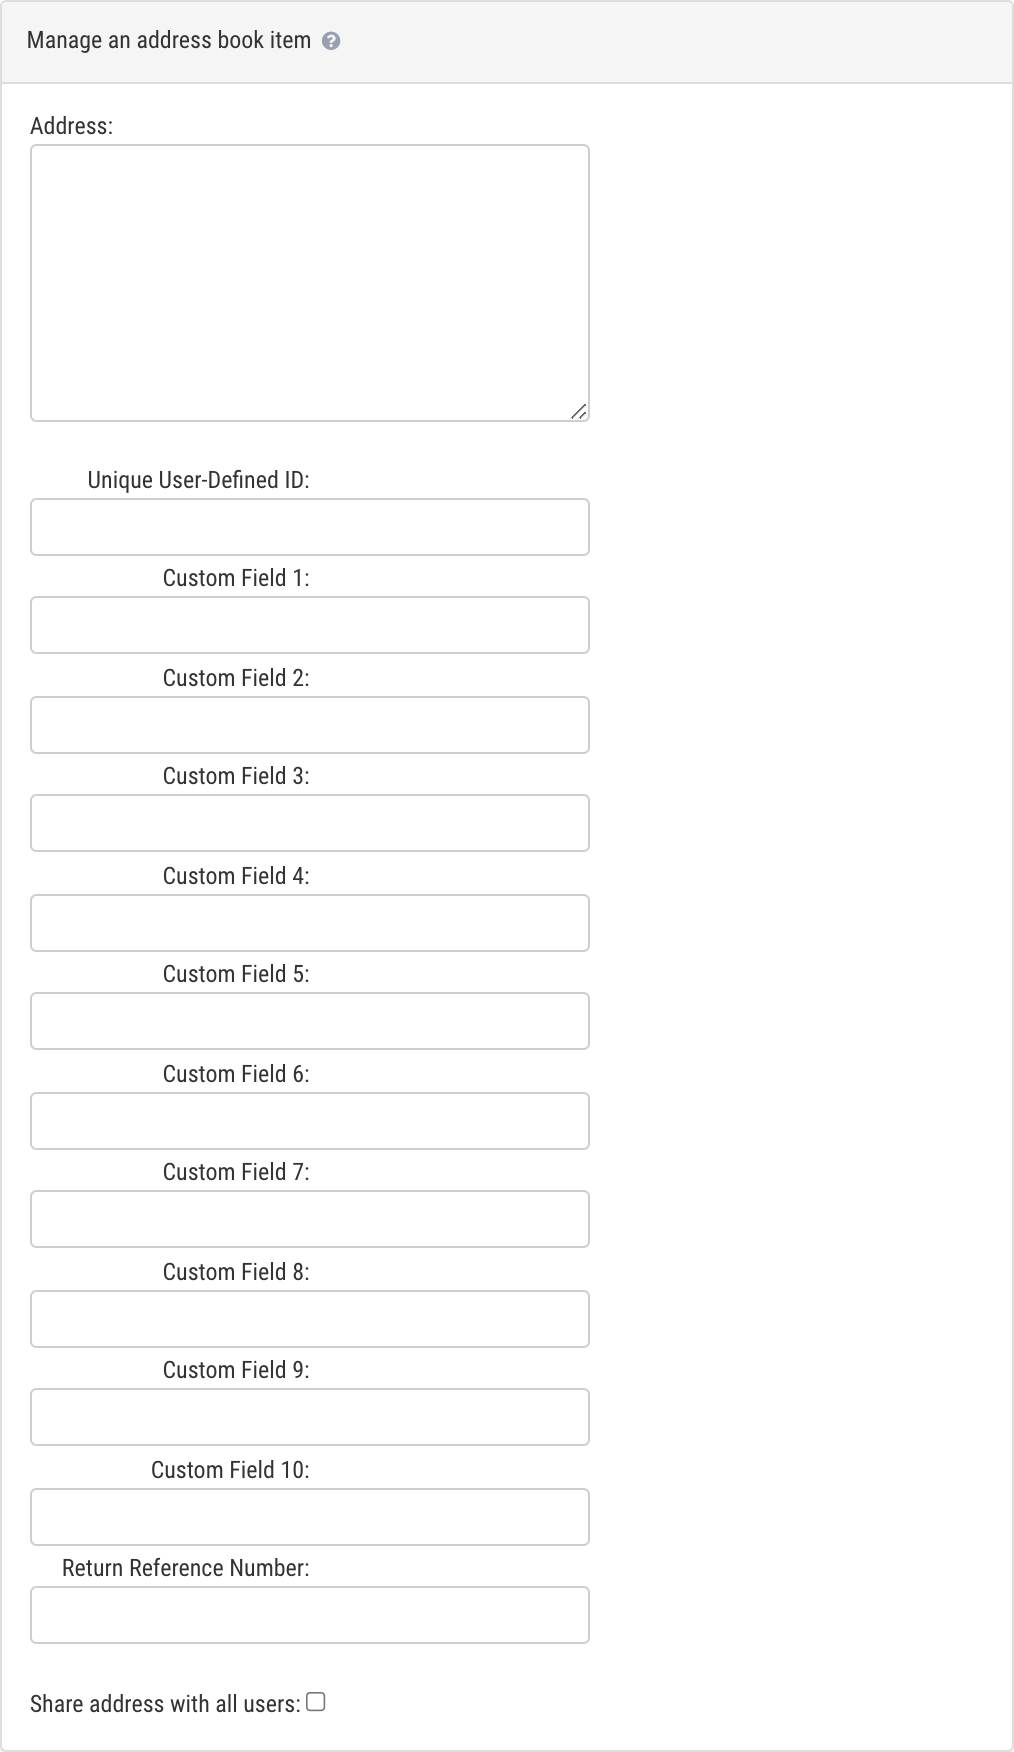
New address book entry
Address: Enter an address.
Unique User-Defined ID: This field is used when updating address information by uploading an address file. Learn more about uploading an address file below.
Custom Fields/Return Reference Number: These are variable fields associated with a mail piece that help with mail piece search and identification. Learn more about configuring Custom Fields.
Share address with all users: Check this box to make the address public, so all users in your organization can access it. Leave the box unchecked to make the address private, so only you can access it.
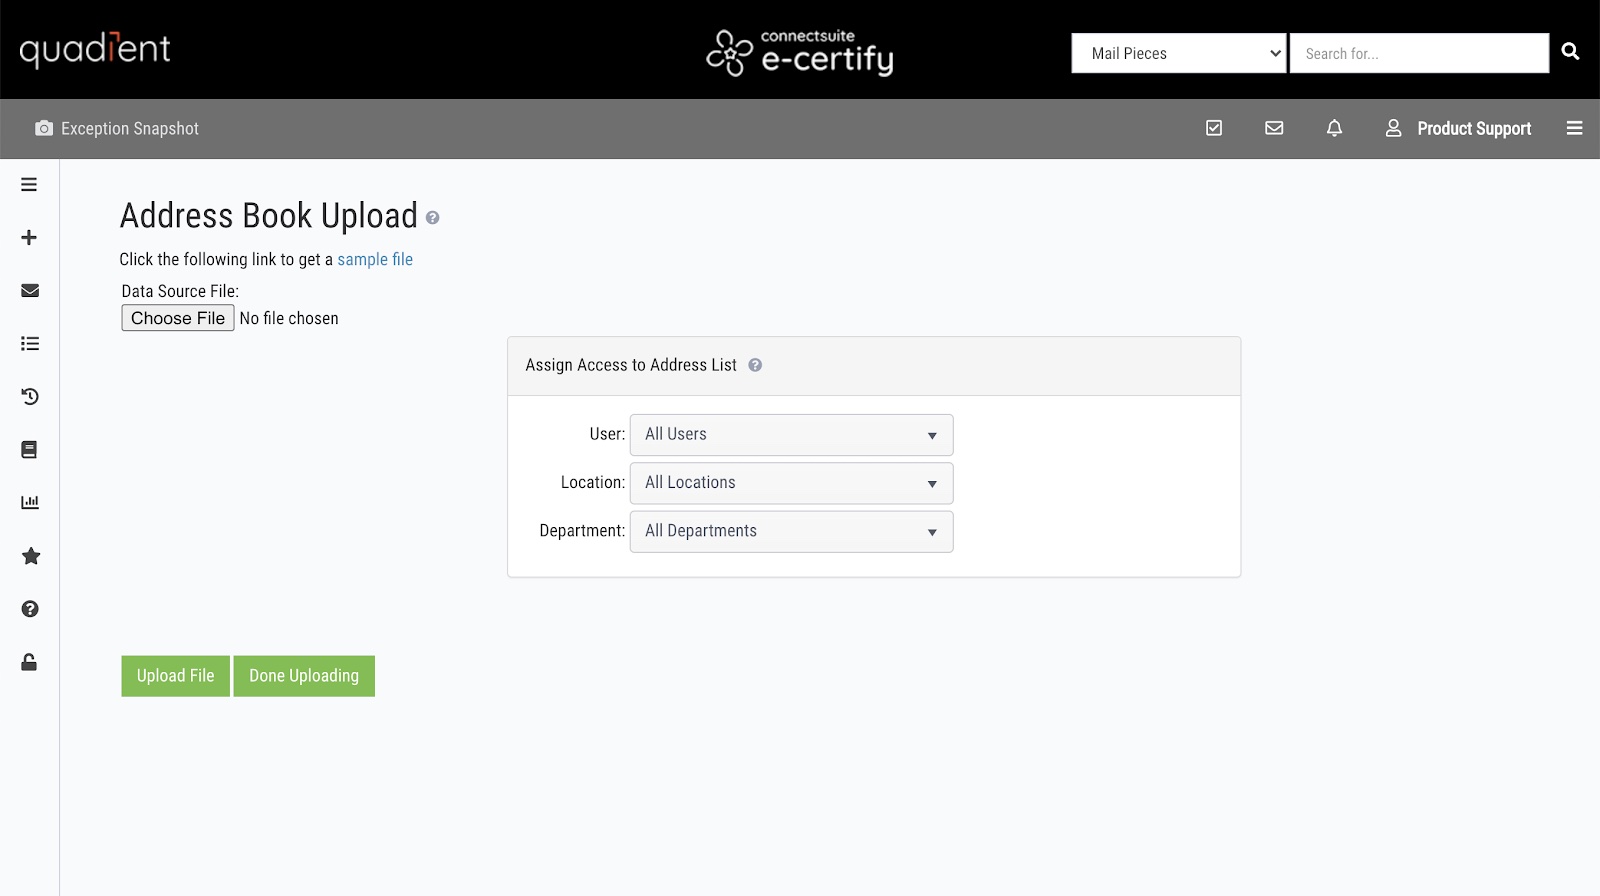
Upload address file
Choose File: The file to be uploaded must be saved as a CSV file. A sample file can be downloaded here.
Preparing your file:
- The first line of the address goes in the address1 column, the second line of the address goes in the address2 column, and so on.
- Every address must include a unique value in the unique user ID (uuid) column.
- To update an existing address in your address book, ensure that the updated version in your file includes the appropriate unique user ID.
Assign Access to Address List: By assigning access, you’re deciding who can view, edit, and delete the uploaded addresses.
- User: Select All Users to make the addresses accessible by all users. By selecting a specific user, the addresses will only be accessible by the assigned user. Assigning a specific user supersedes location and department assignments.
- Location: By selecting a specific location, the addresses will be accessible by only users in that location.
- Department: By selecting a specific department, the addresses will be accessible by only users in that department.
- Note: If both a location and department is selected, a user must meet both of those criteria to access the addresses.
- Note: Users who have the Filter By User display filter enabled in the user settings will only see addresses assigned specifically to them, regardless of any location or department assignments here. Learn more about display filters for Users.
Example access configurations:
- All Users/All Locations/All Departments: This combination ensures the addresses will be accessible by everyone in your organization.
- All Users/All Locations/[Finance] Department: The addresses will be accessible by all users in all locations who are part of the Finance department.
- All Users/[New York] Location/All Departments: The addresses will be accessible by all users in all departments in the New York location.